Introduction
The Media Plan level is directly below the Advertiser level in the Marin Social organizational hierarchy (Advertiser > Media Plan > Campaign > Ad Set > Ad). Media Plans serve as folders which house campaigns. You might want to create a distinct Media Plan for each quarter, season, product line, etc.
In this article, we'll show you how easy it is to create a Media Plan for your Facebook account. We'll break down the process into a few sections: Try it Out, Tracking, Advanced Configuration and Message Booster. Note that while we have broken the guide into sections, creating a Media Plan is is still a singular step-by-step process.
Step-By-Step
Prefer to follow along with our step-by-step outline? Here are the steps we followed in the interactive exercise above to create a Media Plan along with a few other settings for you to consider as well.
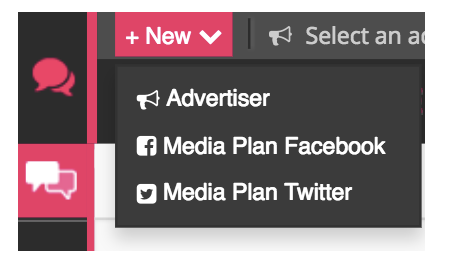
- Click on +New, then select Media Plan Facebook

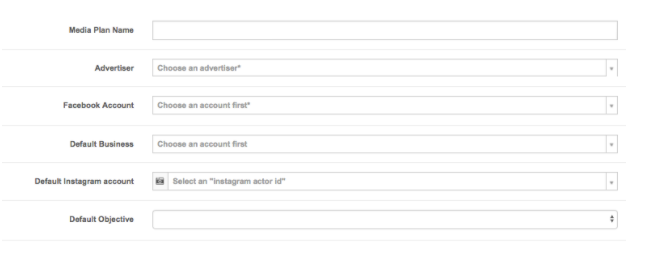
- Choose the Advertiser and select the associated Facebook Account. You will then choose what you would like to promote (a page, pixel, or an application). This will auto-populate the promoted object, but you can always override this selection at any time. You can also choose a default objective and Instagram account should you wish to do so.

- Next, fill in the Media Plan Setup fields.
- Your main KPI will be chosen for you based on the Media Plan objective you selected earlier in the setup process.
- Now it's time to customize your ROI display. This is a dashboard widget that gives a color-coded evaluation of your campaign’s performance in comparison with your ROI goal. Note that you should enter a value only if your ROI is based on a CPC or CP main KPI. (The value must be numeric.)
- The next step is to customize your revenue. Revenue Amount is by far the most widely selected choice, as it pulls in data from conversion pixels and third-party tracking solutions.
- Build your dashboard by selecting which metrics you want to see in your campaign dashboard.
Tracking
- If you are measuring conversions using a pixel (whether as your Main KPI or on your dashboard), make sure the pixel is activated by selecting it in the Tracking > Pixel (s) window.
- If applicable, activate third-party tracking partners.
Tip: Once you have activated a third party tracking system, you will be able to see and choose conversion events in the Build Dashboard and/or Main KPI section. - Customize your tracking attribution window.
- If desired, you can now configure tracking specs. Tracking specs is a JavaScript Object Notation (JSON) that allows you to track what actions are taken by users interacting with your ad. Tracking specs will only track, it will not optimize for that action nor does it charge based on that action. The main use case for tracking specs is tracking mobile app install or events from a desktop campaign (video view campaign / post engagement). Simply add the tracking spec :{‘action.type’: ‘mobile_app_install’, ‘application’: ‘APPLICATION_ID’}by replacing APPLICATION_ID with the Facebook application ID connected to your mobile app.
For more information on tracking specs, please visit the Facebook documentation link: https://developers.facebook.com/docs...racking-specs/ - Set up Media Plan-level click tags, View Tags or URL tags as necessary.
Advanced Configuration
- Apply Optimization rules, if desired.
- If desired, apply a reporting template to the Media Plan. The reporting template will be reflected when the reporting interface is accessed via the
External Access URL.
You can also add a margin fee to reporting (for agencies). - Have budget from paused ad sets allocated to active ad sets (this is only applicable when ad sets are paused by optimization rules.)
- Set up Autopause (final and/or periodic) to monitor: budget spent, clicks, impressions etc. If selected, the platform will pause any ad scheduling once the Autopause is triggered for all campaigns sitting in this media plan. Note: Ad scheduling can be found in the campaign settings.
Important: Spend is pulled into Marin Social in near-real-time, every 15-minutes, so Autopause should not be used as a hard stop for Spend.
Message Booster
- If you use the Message Booster, activate budget capping and customize ad set naming conventions.
- Customize your naming conventions for ads and ad sets.
Important Notes
- To move a campaign between media plans, follow the instructions outlined here.
- Please be sure to select the correct Facebook ad account as this field cannot be edited once the Media Plan is saved.
- In the Main KPI section, select a single conversion event (the most important one) for all direct response objectives like Catalog Sales KPI, Lead Gen, Conversion KPI, etc.
- In the Tracking section > Ad Tracking, please be sure to select the pixel. If you add it after the campaigns are created or imported in the media plan, the system will ask for a re-sync.