Introduction
The Marin Social Pacing Dashboard is a tool for budget management and notifications, designed to help you keep your budgets and KPIs on track.
This tool goes above and beyond the Pacing column offered in the Marin Social platform by giving you details about whether your spend and KPIs are on track. This tool gives you comprehensive insight into your current results alongside daily expected data based on your target and project's expected timeframe. The results are split by campaign and ad set, in order to highlight which publisher object is responsible for any over or underpacing of your project.
The Social Pacing Dashboard also offer color-coded gauges for an at-a-glance view of your budgets and email notifications so you’ll know exactly which campaigns need your attention prior to logging into Marin Social.
Note: This feature is currently available only in Marin Social.
Creating, Editing, Duplicating, And Deleting Pacing Projects
Creating A Pacing Project
- From the Campaigns or Ad Sets tab, select the objects you wish to group together as part of a Pacing Project. Alternately, skip to step two and you can add Campaigns or Ad Sets later.
- You can even add campaigns or ad sets to multiple Pacing Projects to keep track of all your budget pacing needs.
- Click on the Create button (Plus ‘+’ icon).

- Select Pacing Project from the left-hand navigation.
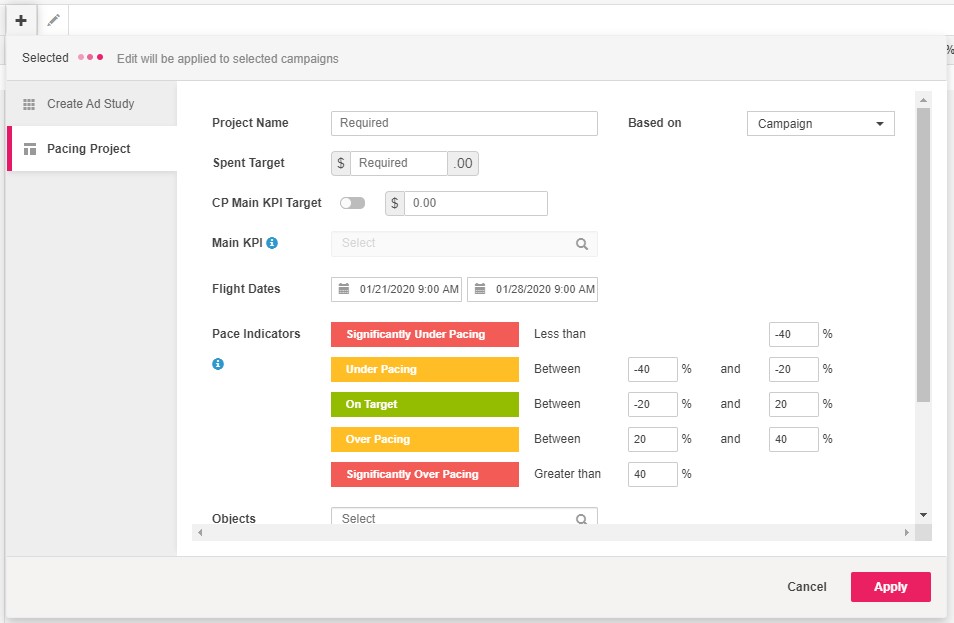
- Give your new Pacing Project a name. We suggest using something descriptive, such as the objective or line of business.
- From the Based on drop-down, select Campaign or Ad Set. This should align with the level at which you’re setting your Pacing Project. For example, if you've already applied this Pacing Project to several campaigns, you should set this Project at the campaign level.

- Input a spend target.

- Optionally, you can track your progress against any actions by inputting your Main KPI. To enable, provide your KPI information alongside the expected Cost Per KPI (CP Main KPI Target).

-
Flight Dates refer to the start and end date of your Pacing Project.

- The Pace Indicators allow you to assign color coding to specific percentage ranges, so you can tell at a glance how your campaigns or ad sets are performing.
Here you can define whether your spend is On Target, Over Pacing, Under Pacing, Significantly Over Pacing, or Significantly Under Pacing.
These definitions are based on a percentage or percentage range of your choosing. For example, you might consider "On Target” to be between 5% and -5% of your desired budget. “Over pacing” might be 5 to 15% over budget, while under pacing is -5 to -15%. And “Significantly over/under pacing” is beyond 15% and -15% respectively. You can enter these percentages into your pace indicators based on your own pacing definitions for your account.

- From the Objects section, you can select the objects to which this Pacing Project will apply. If you selected any campaigns or ad sets prior to clicking on your Pacing Project, these will be included automatically. If you need to add additional campaigns or ad sets, you can do so from the search bar in this section. You can add additional objects by clicking the Plus ‘+’ sign next to the corresponding object or remove objects by clicking the Minus ‘-’ sign.

- If you would like to receive email notifications about your pacing, you can add email addresses separated by a space.

- When all of your settings are in place, click Apply.

- Once your Pacing Project has been created, you can click on the Pacing tab along the top-navigation to see your new Pacing Project.
Note: It might take a few minutes for a newly-created Pacing Project to appear in this list.
Editing Pacing Projects
- From the top navigation, select the drop-down arrow next to the Pacing tab.
- Select Pacing List to see a list of all existing Pacing Projects.

- Check the box next to your desired Pacing Project.
- Click the Edit button (‘pencil’ icon) to make changes to your Pacing Project.

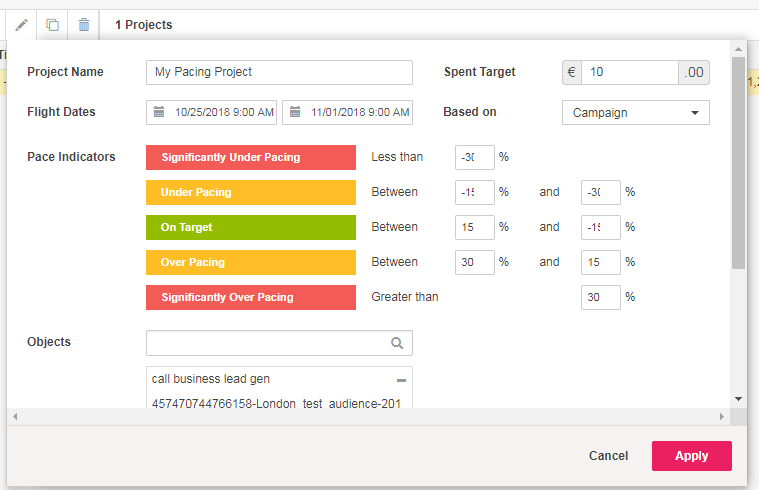
- From here you make any needed updates to your Pacing Project.
- When you're finished, click Apply.
Duplicating Pacing Projects
- From the top navigation, select the drop-down arrow next to the Pacing tab.
- Select Pacing List to see a list of all existing Pacing Projects.

- Check the box next to your desired Pacing Project.
- Select the Duplicate button (‘two sheets of paper’ icon) to duplicate an existing Pacing Project.

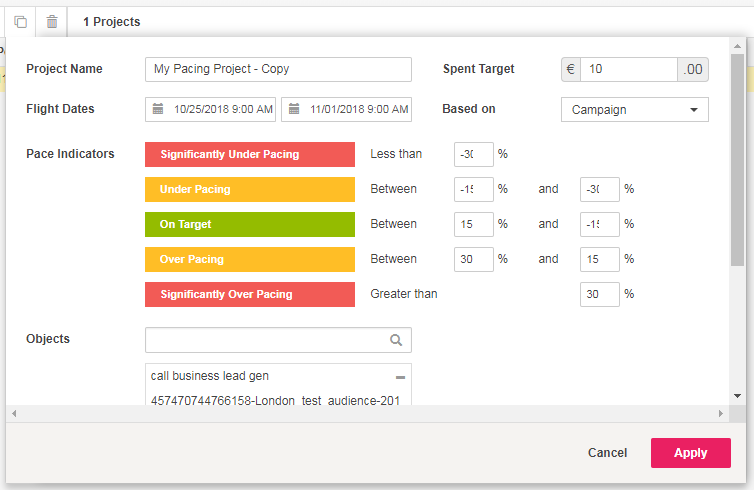
- From here you can make any changes that are needed to your newly-copied Pacing Project, such as updating the name, applying new objects, or adjusting date ranges.
- When you’re finished, click Apply. You should see your new Pacing Project in your list of existing Pacing Projects.
Note: It might take a few minutes for a newly-created Pacing Project to appear in this list.
Deleting Pacing Projects
- From the top navigation, select the drop-down arrow next to the Pacing tab.
- Select Pacing List to see a list of all existing Pacing Projects.

- Check the box next to your desired Pacing Project.
- Select the Delete button (‘trash can’ icon) to delete an existing Pacing Project.

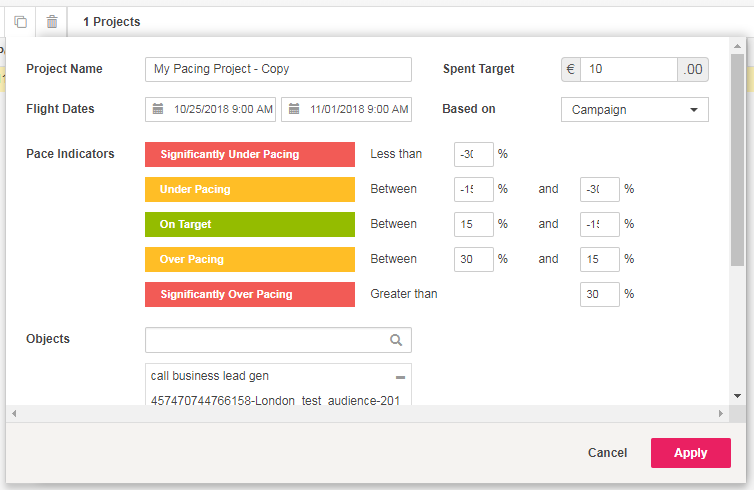
- You will receive a notification asking you to confirm this deletion. Select Yes to proceed or No to cancel.

Viewing Pacing Projects
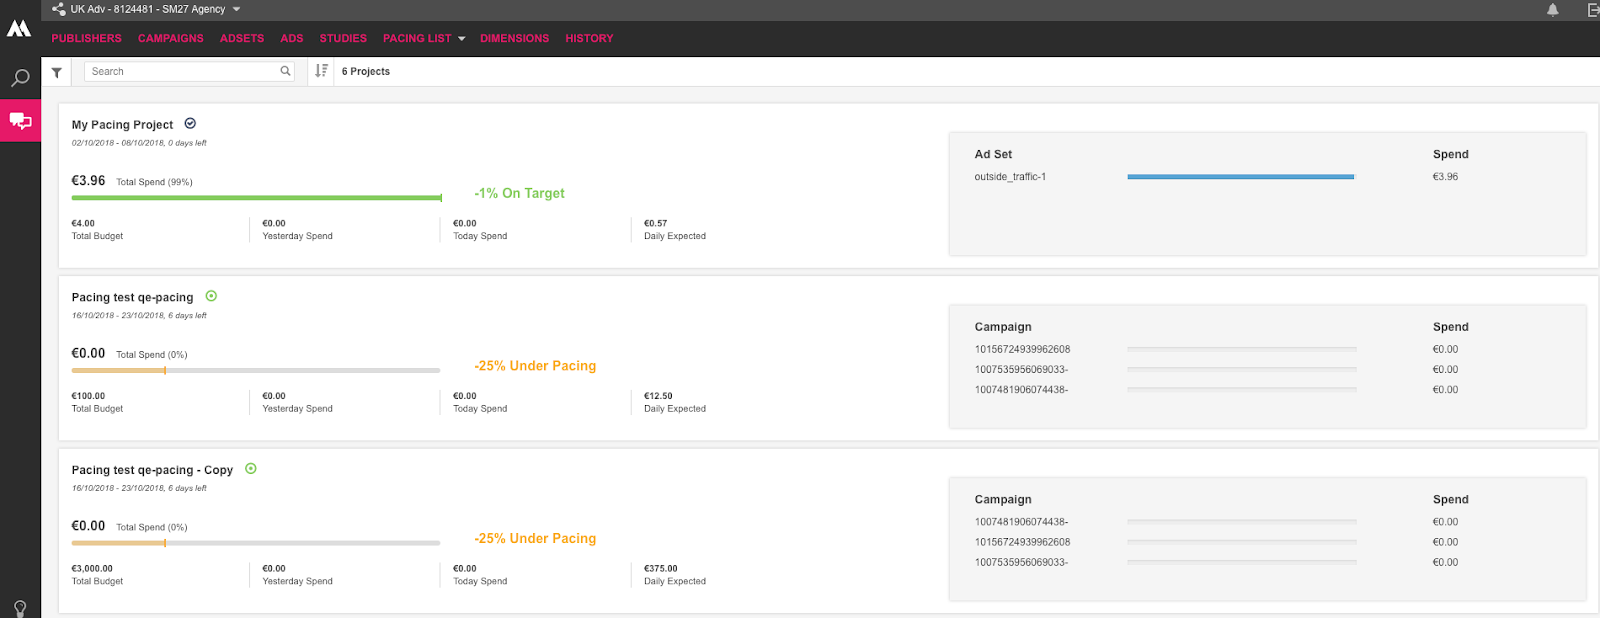
Once your new Pacing Project has been created, you can view it in the Social Pacing Dashboard by clicking directly on the Pacing tab or by selecting the drop-down arrow next to the Pacing tab and selecting Pacing.
Here you can see your existing Pacing Project along with your total budget, total spend, yesterday’s spend, today’s spend, and daily expected spend. The gauge will show green, yellow, or red, depending on whether your pacing is on target, over/under target, or significantly over/under target, based on the settings you applied when you created your Pacing Project. Next to the gauge, you will also see a percentage indicating how much over/under target your campaigns or ad sets are currently pacing.

At the right-hand side of your Pacing Project, you can see a list of associated campaigns or ad sets along with their individual spend.

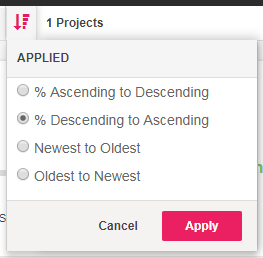
You can use the search bar to search for a specific Pacing Project or click the filter icon to sort ascending to descending, descending to ascending, newest to oldest, or oldest to newest.
